Keep Your Kitchen Cabinets Sparkling: A Complete Cleaning Guide
Your kitchen cabinets work harder than almost any other surface in your home. They endure daily splashes from cooking, sticky fingerprints, grease buildup, and constant opening and closing. Yet many homeowners overlook proper cabinet maintenance until stains become stubborn or the wood starts to look dull and worn.
Regular cabinet cleaning doesn't just keep your kitchen looking fresh—it protects your investment and extends the life of your cabinetry. Whether you have painted wood, natural wood, laminate, or custom cabinets in Orlando, FL, the right cleaning approach can restore their original beauty and prevent costly repairs down the road.
This comprehensive guide walks you through everything you need to know about cleaning kitchen cabinets effectively, from identifying your cabinet material to tackling tough stains and establishing a maintenance routine that keeps them looking their best year-round.
Understanding Your Cabinet Materials
Before reaching for any cleaning products, identify what type of cabinets you're working with. Different materials require different approaches, and using the wrong cleaner can cause permanent damage.
Wood Cabinets
Natural wood cabinets, including oak, maple, cherry, and custom varieties, need gentle care to preserve their finish. These surfaces can be damaged by excessive moisture or harsh chemicals that strip away protective coatings.
Painted Cabinets
Painted surfaces are generally more durable and easier to clean than natural wood, but they can still chip or discolor if scrubbed too aggressively with abrasive materials.
Laminate Cabinets
Laminate offers excellent stain resistance and durability. These synthetic surfaces can handle stronger cleaning products than wood but should still be treated with care around the edges where moisture can seep in.
Thermofoil Cabinets
These vinyl-wrapped cabinets are water-resistant and easy to maintain, though extreme heat can cause the material to peel or bubble.
Essential Cleaning Supplies
Gather these basic supplies before starting your cabinet cleaning project:
- Microfiber cloths (at least 4-6 clean cloths)
- Soft-bristled toothbrush or small cleaning brush
- Vacuum with brush attachment
- Mild dish soap
- White vinegar
- Baking soda
- Wood polish or conditioner (for wood cabinets only)
- Spray bottles for mixing solutions
- Step ladder or stool for reaching upper cabinets
Avoid harsh chemicals like bleach, ammonia, or abrasive cleaners that can damage cabinet finishes. Skip paper towels, which can scratch surfaces, in favor of soft microfiber cloths.
Step-by-Step Cabinet Cleaning Process
Step 1: Remove Everything and Prepare
Start by emptying all cabinet contents. This gives you full access to interior surfaces and prevents items from getting wet or damaged during cleaning. Use this opportunity to declutter expired items or products you no longer use.
Remove cabinet doors and drawers if they need deep cleaning, but this step isn't necessary for routine maintenance. Take photos before removing hardware to remember proper placement.
Step 2: Dust and Vacuum
Use a vacuum with a brush attachment to remove loose debris, crumbs, and dust from cabinet interiors. Pay special attention to corners and crevices where particles accumulate. Wipe down shelves with a dry microfiber cloth to capture any remaining dust.
For cabinet exteriors, start by dusting the top surfaces where grease and grime tend to build up most heavily.
Step 3: Mix Your Cleaning Solution
For most cabinet types, create a gentle cleaning solution by mixing 2 tablespoons of mild dish soap with 1 quart of warm water. This solution effectively cuts through grease without damaging finishes.
For stubborn stains or heavy buildup, create a paste using 2 tablespoons of baking soda mixed with just enough water to form a spreadable consistency.
Step 4: Clean Cabinet Interiors
Dip a microfiber cloth in your soapy solution, wring it until slightly damp (not soaking), and wipe down all interior surfaces. Work from top to bottom, cleaning shelves, walls, and the cabinet floor.
Use a soft-bristled brush to clean grooves, corners, and detailed areas where dirt collects. Rinse with a clean, damp cloth to remove soap residue, then dry thoroughly with a fresh microfiber cloth.
Step 5: Tackle Cabinet Exteriors
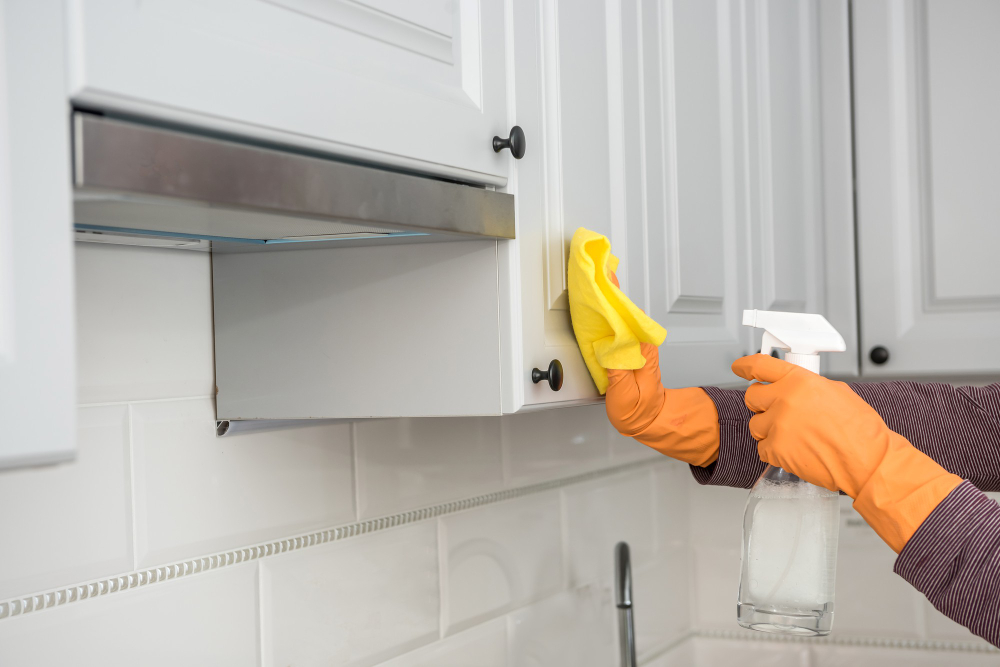
Cabinet fronts require the most attention since they face the most exposure to cooking residue and handling. Apply your cleaning solution with a slightly damp cloth, working in the direction of the wood grain for wood cabinets.
For painted or laminate surfaces, you can use gentle circular motions. Focus extra attention on areas around handles and knobs where fingerprints and oils accumulate.
Step 6: Address Stubborn Stains
For grease stains or sticky residue, apply your baking soda paste directly to the affected area. Let it sit for 5-10 minutes, then gently scrub with a soft brush or cloth. This method works particularly well on painted surfaces.
Alternatively, mix equal parts white vinegar and warm water in a spray bottle. Spray the solution on stains, let it sit briefly, then wipe clean. Always test any cleaning solution on an inconspicuous area first.
Step 7: Clean Hardware
Remove cabinet handles and knobs if they're heavily soiled. Soak them in warm, soapy water for 10-15 minutes, then scrub gently with an old toothbrush. For metal hardware, you can use a specialized metal cleaner for extra shine.
If you prefer not to remove hardware, clean around it carefully with a small brush or cloth, making sure to dry thoroughly to prevent water spots.
Step 8: Final Rinse and Dry
After cleaning with soap solutions, always rinse surfaces with a clean, damp cloth to remove any residue. Soap buildup can attract more dirt and leave a cloudy film on cabinet surfaces.
Dry all surfaces completely with clean microfiber cloths. Pay special attention to areas around hinges and hardware where water can collect and cause damage.
Maintaining Cabinet Beauty Long-Term
Weekly Maintenance
Wipe down cabinet fronts with a slightly damp microfiber cloth to remove fingerprints and light soil. This prevents buildup that becomes harder to remove later.
Monthly Deep Clean
Perform the complete cleaning process described above at least once monthly, or more frequently if you cook often or have a busy household.
Immediate Attention
Clean up spills and splatters immediately to prevent staining. Grease and acidic substances like tomato sauce or wine can cause permanent damage if left on surfaces too long.
Wood Cabinet Care
Apply a high-quality wood conditioner or polish every 3-6 months to natural wood cabinets. This helps maintain the finish and prevents the wood from drying out or cracking.
When to Consider Professional Help or Replacement
Sometimes cabinet cleaning reveals damage that goes beyond what regular maintenance can address. Deep scratches, water damage, worn finishes, or structural issues may require professional restoration or replacement.
If your current cabinets are outdated, damaged beyond repair, or no longer meet your needs, consider upgrading to new cabinetry. Professional installation ensures proper fit and function while giving you the opportunity to customize storage solutions for your specific requirements.
Transform Your Kitchen with Professional-Grade Results
Regular cabinet cleaning protects your investment and keeps your kitchen looking its best. By following these steps consistently, you'll maintain beautiful, functional cabinets that serve your family well for years to come.
However, even the best-maintained cabinets eventually need updating. If you're seeking custom cabinets in Orlando, FL, contact Pro Work Construction today for free estimates. Their experienced team can help you design and install cabinets that combine beauty, functionality, and lasting quality—giving you a kitchen you'll love for decades.