How to Clean Kitchen Cabinets Like a Pro: A Complete Guide
Your kitchen cabinets work harder than almost any other surface in your home. They face daily exposure to cooking grease, steam, fingerprints, and food splatters. Over time, this buildup can make even the most beautiful cabinets look dull and worn. Regular cleaning not only keeps your kitchen looking fresh but also extends the life of your cabinetry investment.
Whether your cabinets are made of wood, laminate, or painted surfaces, proper cleaning techniques will restore their original beauty and protect them from damage. This comprehensive guide walks you through everything you need to know about cleaning kitchen cabinets safely and effectively.
Gather Your Cleaning Supplies
Before you begin, assemble the right tools and products for the job. Having everything within reach makes the process smoother and more efficient.
Essential cleaning supplies:
- Microfiber cloths (at least 4-6 pieces)
- Soft-bristled toothbrush or small scrub brush
- Spray bottles
- Warm water
- Dish soap (mild, grease-cutting formula)
- White vinegar
- Baking soda
- Wood cleaner or specialized cabinet cleaner (for wood cabinets)
- Vacuum cleaner with brush attachment
- Step ladder or sturdy stool
Optional supplies for deep cleaning:
- TSP (Trisodium Phosphate) cleaner for heavy grease buildup
- Murphy's Oil Soap for wood cabinets
- Magic eraser sponges for stubborn marks
- Soft-bristled paintbrush for detailed areas
Prepare Your Kitchen for Cabinet Cleaning
Clear the area around your cabinets to give yourself plenty of working space. Remove items from countertops that might get in your way, and consider laying down towels to catch any drips.
Turn off the power to any electrical outlets near your work area if you're using liquid cleaners. Remove cabinet hardware if possible—this allows you to clean both the hardware and the cabinet surfaces more thoroughly.
Take photos of your hardware placement before removal. This simple step saves time during reassembly, especially if you have different types of knobs and pulls throughout your kitchen.
Step-by-Step Cabinet Cleaning Process
Remove Loose Debris and Dust
Start by using your vacuum's brush attachment to remove loose crumbs, dust, and debris from cabinet surfaces, corners, and crevices. Pay special attention to areas around hinges and handles where buildup commonly occurs.
Wipe down all surfaces with a dry microfiber cloth to remove any remaining dust particles. This prevents you from simply moving dirt around when you begin wet cleaning.
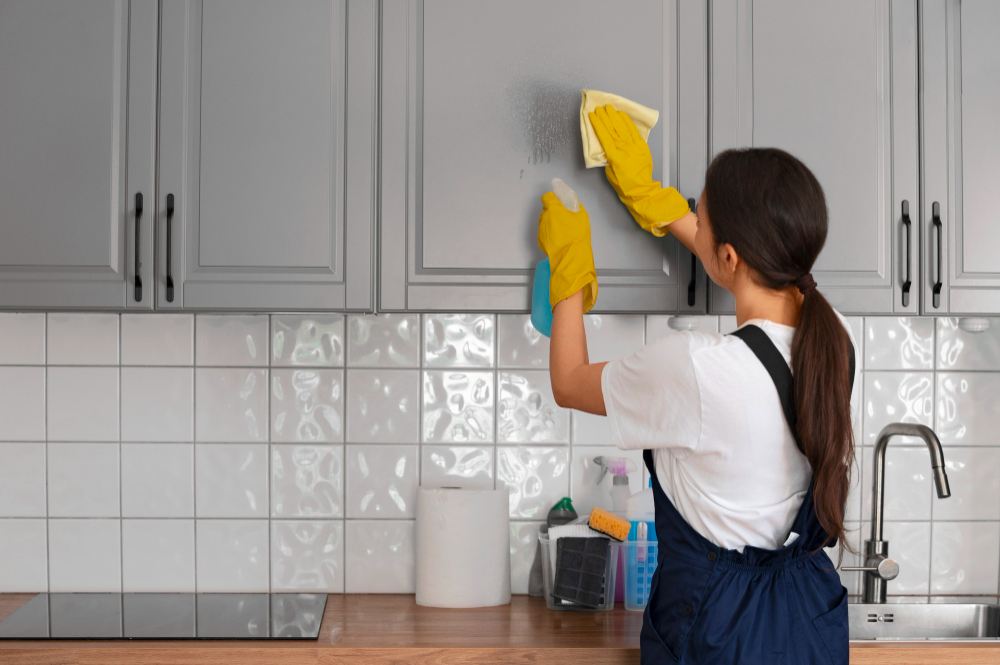
Clean Cabinet Exteriors
For painted or laminate cabinets:
Mix a solution of warm water and a few drops of mild dish soap in a spray bottle. Spray a small section of the cabinet and wipe with a damp microfiber cloth, working from top to bottom.
For stubborn grease spots, apply the cleaning solution and let it sit for 2-3 minutes before wiping. Use a soft-bristled toothbrush to gently scrub textured surfaces or detailed areas.
For wood cabinets:
Use a wood-specific cleaner or create a gentle solution with Murphy's Oil Soap and warm water. Apply the cleaner sparingly with a slightly damp cloth, always working in the direction of the wood grain.
Avoid oversaturating wood surfaces, as excessive moisture can cause warping or damage the finish.
Tackle Cabinet Interiors
Empty each cabinet completely before cleaning. Vacuum out crumbs and debris, then wipe down all interior surfaces with your chosen cleaning solution.
Don't forget to clean the undersides of shelves and the backs of cabinets where dust and grease can accumulate. For areas with heavy buildup, use a paste made from baking soda and water, let it sit for 10 minutes, then scrub gently and wipe clean.
Clean Cabinet Hardware
Remove hardware and soak pieces in warm, soapy water for 15-20 minutes. Use an old toothbrush to scrub away buildup from crevices and decorative details.
For tarnished brass or copper hardware, create a paste with equal parts flour, salt, and white vinegar. Apply the paste, let it sit for 30 minutes, then scrub and rinse thoroughly.
Dry all hardware completely before reinstalling to prevent water spots and corrosion.
Address Stubborn Stains and Grease Buildup
Some kitchen cabinets face years of accumulated grease and stains that require extra attention. For these challenging situations, stronger cleaning methods may be necessary.
Create a paste using baking soda and water for organic stains and light grease buildup. Apply the paste to problem areas, let it sit for 15 minutes, then scrub gently with a soft brush and wipe clean.
For heavy grease accumulation, particularly on cabinets near the stove, mix equal parts white vinegar and warm water in a spray bottle. The acid in vinegar cuts through grease effectively while being gentle on most cabinet finishes.
TSP cleaner works well for extremely stubborn buildup, but always test it in an inconspicuous area first and follow manufacturer instructions carefully.
Dry and Polish Your Cabinets
After cleaning, immediately dry all surfaces with clean, dry microfiber cloths. Standing water can damage cabinet finishes and create water marks, especially on wood surfaces.
For wood cabinets, consider applying a wood polish or conditioner after cleaning to restore shine and provide protection. Use products specifically designed for your cabinet's finish type.
Allow cabinets to air dry completely before replacing contents or closing doors. This prevents moisture from being trapped inside, which could lead to odors or mold growth.
Maintenance Tips for Long-Lasting Results
Regular maintenance prevents deep cleaning from becoming a major project. Wipe up spills immediately, and give your cabinets a quick weekly cleaning with a damp microfiber cloth.
Install soft-close hinges and drawer slides to reduce wear and tear on your cabinets. These hardware upgrades prevent slamming that can loosen joints and damage finishes over time.
Keep your kitchen well-ventilated while cooking to reduce grease and moisture buildup on cabinet surfaces. Range hoods and exhaust fans are your cabinets' best friends.
Consider applying a protective coating to high-traffic areas like cabinets near the sink or stove. Clear protective films or regular waxing can shield surfaces from daily wear.
When to Call Professional Cabinet Builders
Sometimes cabinet cleaning reveals damage that requires professional attention. Water damage, loose joints, or worn finishes might indicate it's time to consult with experts.
If your cleaning efforts reveal that your cabinets need refinishing, repair, or replacement, professional cabinet builders can assess the situation and recommend the best course of action. They can also help you decide whether restoration or replacement makes more financial sense.
Professional cabinet builders also provide valuable advice on maintenance techniques specific to your cabinet materials and finish types, helping you protect your investment for years to come.
Keep Your Kitchen Looking Its Best
Clean kitchen cabinets transform the entire look and feel of your cooking space. With regular maintenance and the right techniques, your cabinets can maintain their beauty and functionality for decades.
Remember that prevention is always easier than deep cleaning. Establish a regular cleaning routine, address spills promptly, and your cabinets will reward you with years of reliable service and attractive appearance.
If you're looking for professional cabinet builders in Orlando, FL, contact Pro Work Construction today for free estimates. Our experienced team can help with cabinet maintenance, repairs, or complete kitchen renovations to keep your space looking its absolute best.